Monday, July 16, 2012

Link and the Triforce

Good evening glittery polish lovers! So for a very long time, my favorite video games of all time have been anything Legend of Zelda. Is the music playing in your head yet? I finally got the right green polish, and wella! My Link and the Triforce nails!


Very nice yes? Fit for the Hero of Time? I think so! Off to the how to!  So first I started off with 2 coats of Sally Hansen HD Color in Resolution. It was  little streaky, but the second coat nearly fixed that.  It's a much more Hero of Time green than the pictures show, and it's a shimmery jelly to boot! Delicious! 


Then I used Funky Fingers Down to Earth, a shimmery gold, to paint the Triforce. To give it more definition, I outlined it with a black striper. Of course I needed more glitter to give it a little something extra, so I used my new/first Hot Topic Black Beauty polish in Party Action, which has nice multicolor dot and hexagon glitters. And it comes in a skull shaped bottle. Cool much? After a coat of that on all my nails,  I topped it with a coat of Seche Vite for quick drying and shine. I give Party Action a 6/10 for glitteriness, and the overall mani a 7/10 for application!  Now Link is ready to go get that Triforce, and you are too with this fun video game inspired design!


Sunday, July 15, 2012

A Friend to Experiment With

Good evening all! While I may not have had time to do my nails, last night I did my friend Kiersten's! She was visiting from PA, so I thought, hey why not! As long as it wasn't pink she wanted it, so I did a simple flower mani made with a dotting tool and some awesome polishes! I apologize for the messy application. While the flowers were nice, the base was slapdash because we were rushing to be done before we passed out from being at the beach! And now to a how to!


Nice right? Well here's how it goes. I used Sally Hansen Hard As Nails in Flirt, which I thought would be a dark purple. With the flash and in some light, it looked reddish! Woah! My only problem with this is that it was a little too thin, and that made it a slight pain to apply. What I thought was a perfect amount of polish was actually too much! However, it dried quickly, which was a plus. After that, I used one of my smaller dotting tools to use a shimmery gold polish from Funky Fingers called Down to Earth. Then for the centers I used Sinful Colors Snow Me White. Gorgeous! My friend loved this simple, slapdash, design. Gotta love Kiersten! With a quick coat of Seche Vite, it was dry and shiny! I don't know if I will try this Sally Hansen line again, but I def suggest her other polishes! I give this overall mani a 5/10 for glitteriness and a 7/10 for application. Enjoy and good night! Thanks to Kiersten for being my experimentee. :)

Friday, July 13, 2012

No Girls Allowed

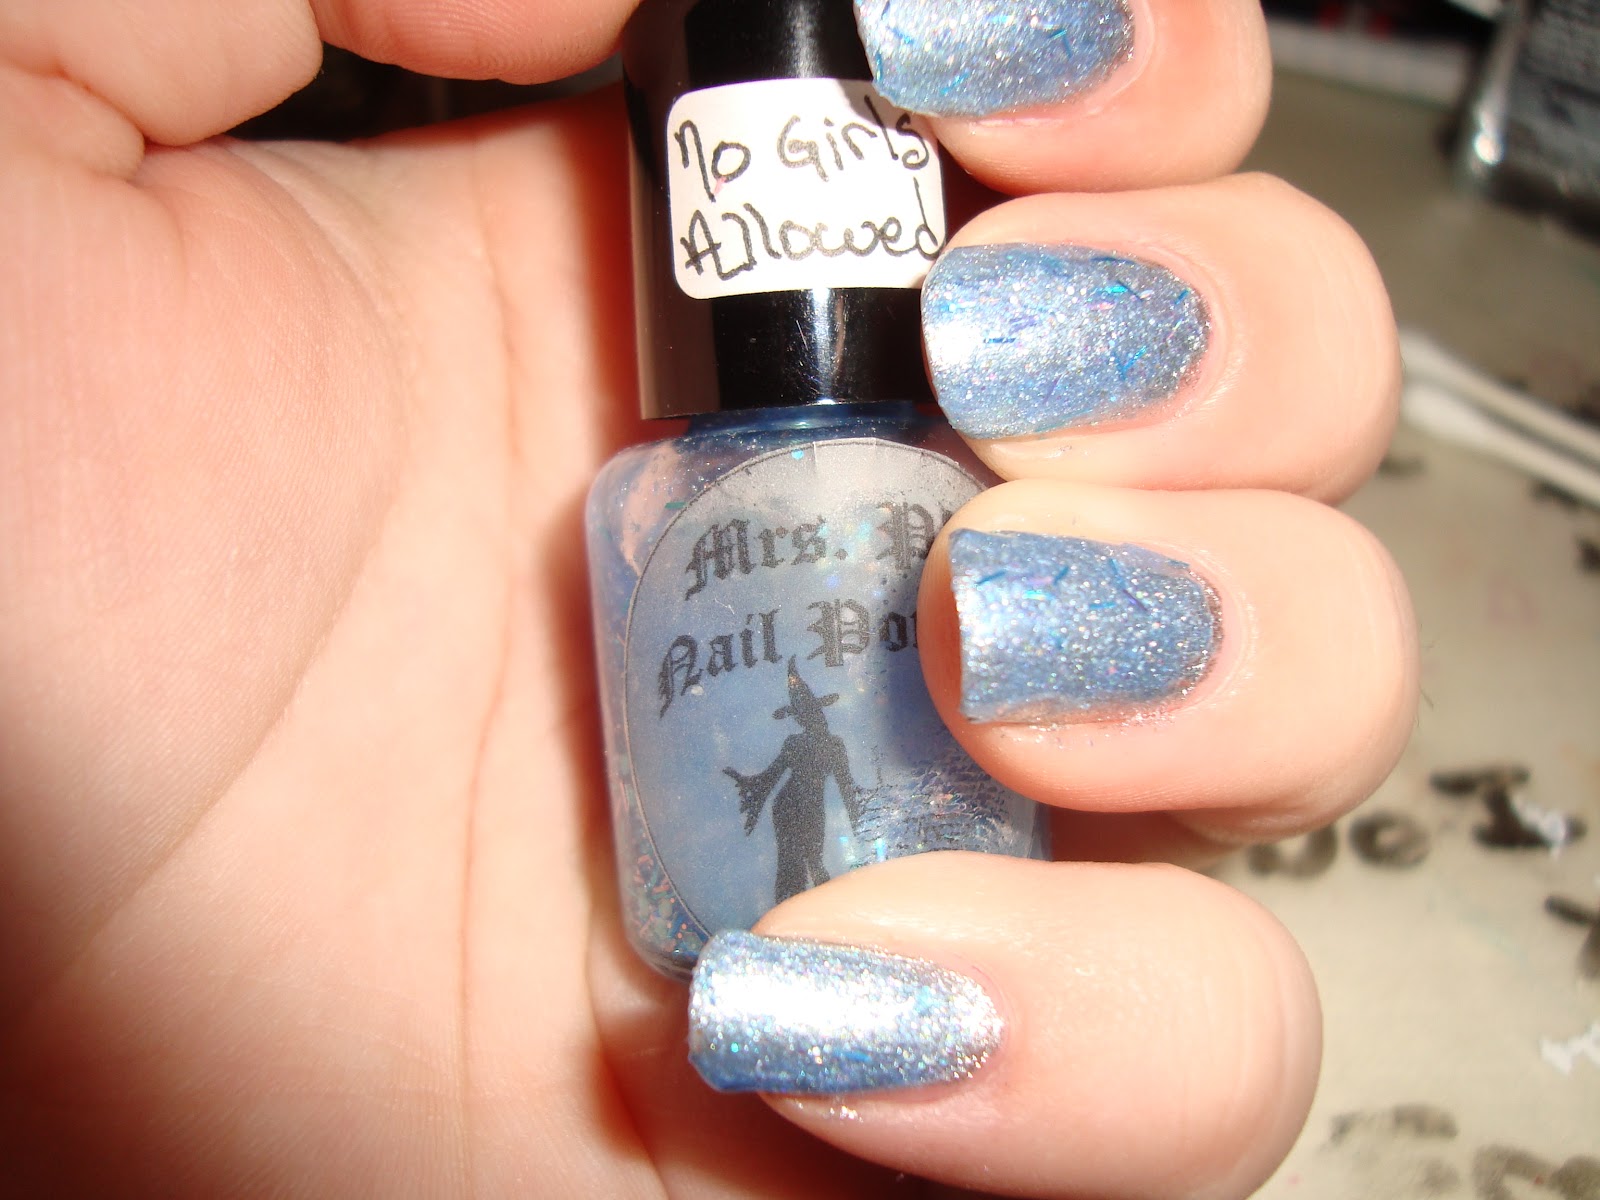
Hello hello! Buona notte! So I got my Avon shipment today, and I had made enough profit to order something for myself for once, so I got a new Nail Pro+ Enamel in Starry Sky, a sequin silver. I also had No Girls Allowed by Mrs. P's Nail Potions still sitting in my untrieds, so I put them both on, and this was the result for my beach day tomorrow!


Alright, let's get this started! So Avon recently reformulated their polish to make it stronger, last longer, and make the glitters glitterier, so I was able to snag something I've wanted for a while, a sparkly, sequin silver called Starry Sky. I let 2 drops off the brush, and used only one coat to get it opaque. The formula was slightly thicker than I expected, but that only meant I had to use both sides of the brush for application. This is definitely a new favorite color/base. 


Oh my! What glitter and shimmer! A perfection glittery silver! I could actually see myself wearing this alone with no design or indie on top! So then I moved on to No Girls Allowed. I found this woman's polish via her post on Llarowe, and I realized what pretty glitters she had, and she's not widely known yet! Best to snatch it up while I can! I waited for her etsy shop to open, pounced, and earned my spot as her first and most enthusiastic customer!  No Girls Allowed has blue and silver bar glitters, blue and silver dot glitters, and a few blue and silver shred glitters in a clear blue base. Paired with Starry Sky, the glitter is wonderful! I did have to shake No Girls Allowed a bit because the bar glitters settled, but the formula was great! 2 coats was all I needed! Then I topped it with a coat of Seche Vite for shine and a quick dry. I give Starry Sky a 9/10 for glitter and a 7/10 for application. For No Girls Allowed, I give it a 8/10 for glitter and a 9/10 for application. Bree is definitely great at nail potions!


*Mrs. P's Nail Potions can be bought from her etsy store at http://www.etsy.com/shop/MrsPsNailPotions *


Wednesday, July 11, 2012

Black Hole

Why good evening glittery polish lovers! So finally after work, the beach, and sunburn, I've got a new mani for you! Ever heard of Black Cat Lacquer? If not, you need to try out her indies, and my first of hers is Black Hole!


Let's get this glittery mani how-to started! So a while back I got 2 of the OPI Minnie Mouse Collection, and finally used the magenta jelly, I'm All Ears. It's a magenta pink jelly bases with tons of silver shimmer. It's a little sheer, so I used 2 coats to reach the opacity I needed. OPI brushes are a little wide (which means I almost always swipe my cuticles), but the color went on wonderfully!


So my friend Heather who does the blog I Feel Polished, pointed me to Black Cat Lacquer. She was having a 20% off promo, so I figured I could try a bottle. I picked Black Hole. It has black/rainbow iridescent diamond glitters, silver dot glitters, and a black jelly base. While it was a little bit thick due to the pigment and amount of glitter, it went on fantastic. The polish translated wonderfully from the bottle to my nails. The rainbow glitteriness from the diamonds was divine! I'd def try one from Black Cat Lacquer again. Just remember, try not to put too much on your nail, or the black base will build up! I give this a 8/10 for the glitter, and a 6/10 for application. It was a bit thick, but I powered through :) 


*Black Cat Lacquer can be purchased for $10 a bottle at her etsy store http://www.etsy.com/shop/BlackCatLacquer?ref=seller_info*

Monday, July 9, 2012

Zoya Zoya!

Good evening my glittery friends! So today while at the mall I discovered a store...a glorious store that had tons of brand name polishes at discounted prices! There will be a blog post on that later, but for now, I'll share what I picked up: Zoya Fleck Top Coat in Maisie! I've been wanting to try one forever, and at $6.95, why not? I did my nails to match my bathing suit for the beach tomorrow! :)


Let us get on with the glitteriness, shall we? So to start this, I put one coat of Zoya Zuza on every finger but my accent (still a bit thick, but apparently this is what happens with mini bottles, for full size bottles are fine) and a coat of Wet N' Wild Shine in Black.  Everything needed only one coat! Fabulous! So this is what everything looked like BEFORE the fleck top coat that is Maisie.


So at first I thought I'd use a darker blue, but wanted to use my Zoya Zuza instead. The Maisie flecks kinda blended in with it a bit too well, but they looked absolutely marvelous on the black! Next time I'll do an all black mani with Maisie on top! The fleck top coat when on very nicely, not thick at all, and on my black nail, I could really see it shift from blue, to green, to gold! Gloriously mesmerizing!  Here is a shot to show the color change of blue/green!


So while it added more glitter, depth, and shimmer to Zuza, it really did a number on my black nail polish! This is my first fleck, and I'm in love! I give it a 10/10 for glitter and 3D effect! I'd def buy another.  Perhaps I shall have to go to Beauty Plus Salon again!  Don't forget to go like my facebook page!


Friday, July 6, 2012

Hot Pink Cheetah Print

Good evening!  Sorry I was so M.I.A. this week, but I had work at my church's summer preschool/daycare for like 7 hours a day for 3 days, and then college stuff the other days that I had to do! Now I'm back! At first I thought I'd do a fruity design, but didn't have the time tonight due to a CPR class tomorrow! So instead I did something easy and stylish I've been thinking of for a while. Here it is! A hot pink cheetah print mani! 


So for this easy, quick mani, here's what you need! Funky Fingers in Screamin' Fuchsia, Sinful Colors in Snow Me White, and then any black striper (I used a Sinful Colors one).  I put on one nice coat of Snow Me White to make the hot pink pop! After it dried a bit, I took almost all of the polish off of my Screamin Fuchsia brush and dabbed blotches onto my nails with the tip of the brush. I let these dry a bit, so that the black would not streak with the pink. Then using my striper, I either drew 2 lines around a spot or drew a 'C' shape. Then true to a cheetah's coat, I then used the tip of my striper to put in more black spots.  I used no top coat (because I did not want to risk the black streaking on the white), and that was it! I definitely like this, and it was surprisingly easy using my left hand to paint as well! No glitter here, but def a spark of originality, and one of my favorite colors!


*Funky Fingers can be purchases at Five Below, where they are 3 for $5!!!*


Monday, July 2, 2012

Freedom Calling 4th of July Mani

Happy Early 4th of July glittery polish lovers! I recently happened upon a restock of Pretty & Polished's Etsy store, and I was able to get my hands on Freedom Calling, a marvelous red, white, and blue glitter polish! Being patriotic, I made a simple yet glittery 4th of July mani!


So to start off I used 1 coat of Sally Hansen's Double Duty Strengthening Base and Top Coat. Then I alternated on my fingers between Avon's Ruby Slipper (quickly becoming my fave shimmery red) and OPI's The Flowers are Blue-Ming! (also becoming my fave glittery blue) using only 1 coat each.  It looked very nice even without the glitter!


Look at the shimmer and glitter! Glorious! After that dried (which was roughly the time it took me to do all 5 nails), I used about 2 coats of Freedom Calling on each nail. Now I love red, white, and blue. This glitter was a clear base chock full of red, white, and blue bar, hex, dot, and square glitters! Truly wonderful! It had very easy application, and I didn't have to fish for glitter. I dabbed a bit at spots that just wouldn't get a hex, but the overall coverage was great!  I give this a 9/10 for glitter and a 9/10 for application. I'll def order from Pretty & Polished again! Then I finished with a generous coat of Sally Hansen's Double Duty Strengthening Base and Top Coat. What shine and glitter!


*Pretty & Polished products are roughly $5 for minis and roughly $10 for full size. You can find them here at her etsy store when she restocks http://www.etsy.com/shop/PrettyandPolished*